No products in the cart.
Halo Ring LED Headlights on NA Miata: DRL Wiring & Styling Tips
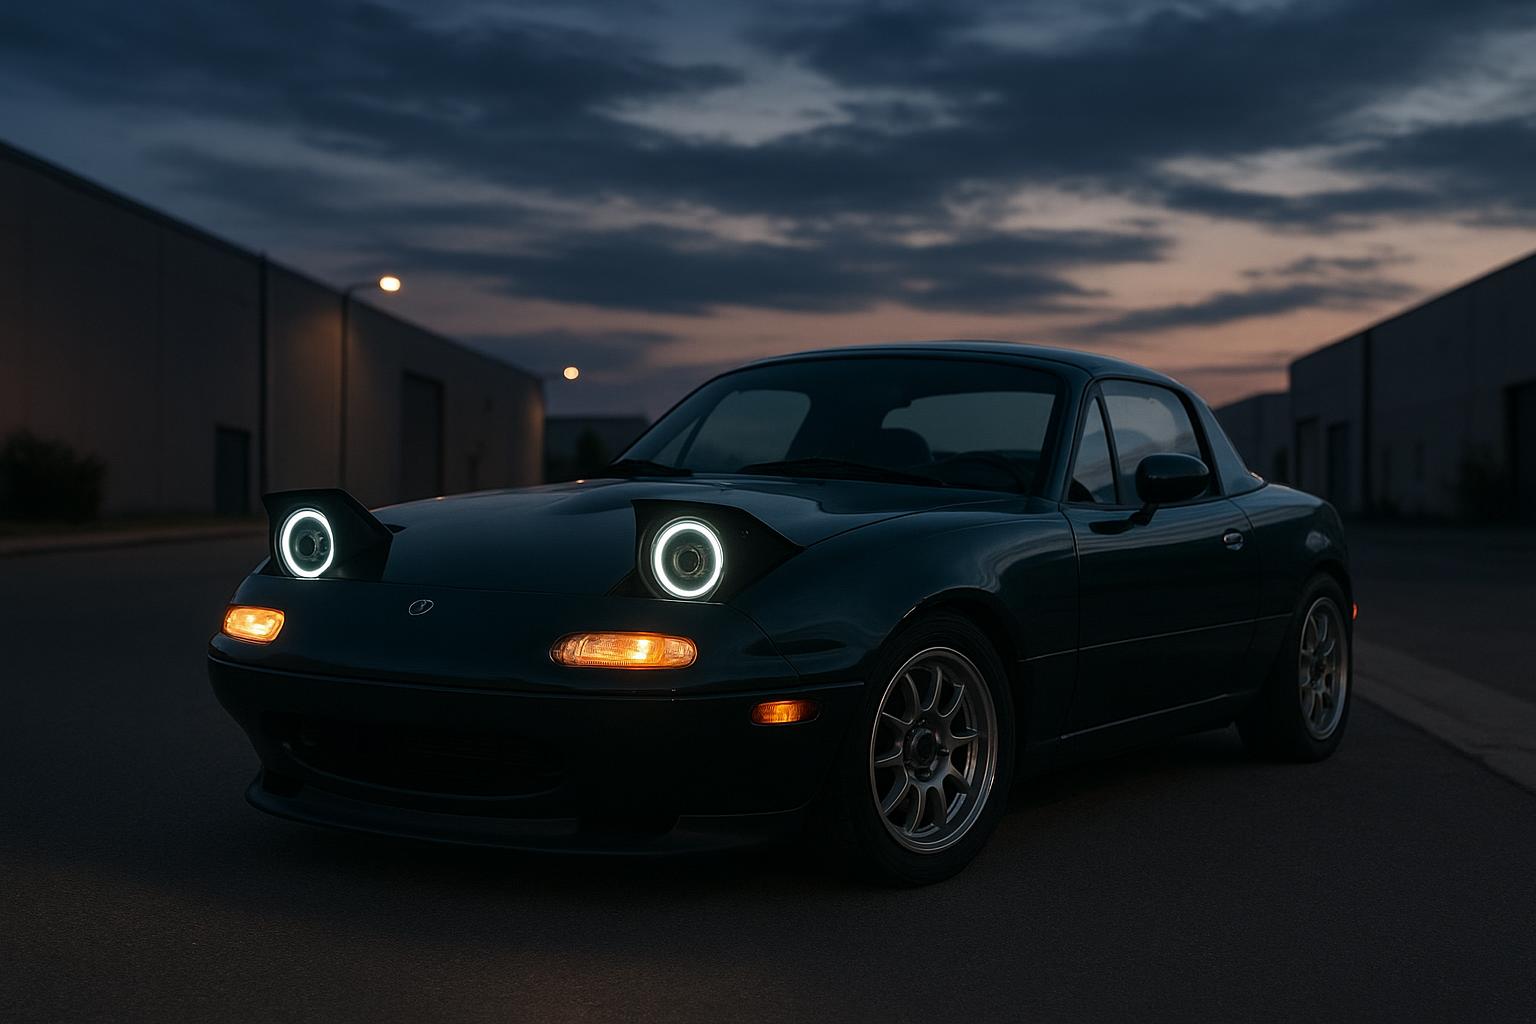
If you’re upgrading NA Miata halo ring LED headlights, the goal isn’t just brighter front-end style—it’s a clean, reversible install that looks factory-plus and works every time. The best builds blend daytime running light visibility, amber turn signal integration, and switchback behavior without hacking up the original loom. That matters on a chassis as loved as the pop-up NA, where every modification should respect the car’s simplicity while elevating its presence.
From a styling standpoint, halos can modernize the NA without erasing its personality. From a wiring standpoint, the smartest approach is to use relay harnesses, fuse taps, and plug-in adapters so the headlight circuit remains untouched. That keeps troubleshooting easy, preserves resale value, and makes future upgrades simpler. If you’re planning the rest of the front-end refresh too, you can explore NA Miata parts and build a cohesive look around the headlights instead of treating them as a standalone mod.
Why Halo Ring LED Headlights Work So Well on the NA Miata
The NA’s front end is iconic, but it’s also a perfect canvas for subtle lighting upgrades. Halo rings give the car a sharper daytime signature, especially on early-model pop-up cars where the headlight buckets and slim nose can disappear in traffic. A properly executed halo setup adds definition without making the car look overdone. The best installations keep the beam pattern clean, the halos evenly lit, and the wiring invisible from the engine bay.
For street use, halos are most effective when they function as true DRLs rather than decorative accents that only come alive at night. That means choosing a light source with stable brightness, proper voltage handling, and a mounting method that doesn’t interfere with the reflector or projector optics. If you’re pairing the front end with a cleaner styling package, it’s worth checking our NA lighting and LED upgrades to compare other front-end brightness and visibility options.
There’s also a safety angle. Modern DRLs help the car stand out in mixed traffic, especially in low sun or overcast conditions. On a lightweight roadster, being seen is part of being enjoyed. The trick is to add visibility without creating electrical noise, flicker, or a messy install that looks like a weekend experiment. That’s why the best halo builds are usually the ones you don’t notice until the car is on and glowing.
Clean DRL Wiring Without Cutting OEM Harnesses
The single most important rule for halo wiring is simple: don’t cut the original Miata wiring unless you absolutely have to. Instead, use add-a-fuse taps, relay-triggered power feeds, and plug-and-play connectors wherever possible. That approach lets the halos draw power from an ignition-switched source while protecting the stock headlight circuit from extra load. It also makes the setup easier to diagnose if a halo stops working later.
A clean DRL layout usually starts at the fuse box. You want an ignition-on source for the halo power lead, a proper ground point on clean metal, and a relay if the halos need to dim or change mode with the parking lights. If you’re running switchback halos, the DRL feed can stay on white or cool white during daytime operation, then hand off to amber when the turn signal circuit is activated. The best systems isolate these functions so a signal pulse never backfeeds into the running-light circuit.
For the neatest result, route wires through factory paths, use cloth tape or split loom, and secure everything with OEM-style clips or low-profile zip ties. Avoid running halo wiring near sharp brackets, hood latch points, or hot components. If you’re working on a broader front-end refresh, our Miata knowledge base is a good place to cross-check electrical and maintenance best practices before you start.
Pro tip: If your halo kit includes a controller, mount it high and dry behind the bumper support or inside the engine bay near the fuse box, never loose behind a headlight bucket where heat and vibration can shorten its life.
Amber Turn Signal Integration and Switchback Setups
Amber integration is where halo kits go from “cool” to genuinely well engineered. A switchback halo can run white as a DRL and flash amber during signaling, giving the NA a modern OEM-inspired appearance. The key is ensuring the turn signal feed is cleanly isolated so the amber flash is bright, immediate, and doesn’t create ghost glow in the white ring. Quality diodes or a dedicated switchback controller are what make that possible.
When integrating with the factory turn signal circuit, check polarity carefully. Many lighting issues come from assuming the halo kit is wired like a simple bulb. LEDs are directional, and the control module often expects a specific positive trigger. If the amber function is weak, delayed, or inconsistent, the problem is often grounding rather than the halo itself. A dedicated chassis ground can solve a surprising number of “bad kit” complaints.
For styling, amber halos work especially well on NA Miatas with a more motorsport-inspired front end. They complement black trim, clear lenses, and aggressive lip packages without looking flashy in a bad way. If you’re chasing a more complete exterior theme, you may also want to pair the headlights with an NA front lip so the lighting and bodywork feel intentional rather than pieced together.
Wiring logic for a switchback halo
- White wire: ignition-switched DRL power
- Amber wire: turn signal trigger from the front indicator circuit
- Ground: direct chassis ground, cleaned to bare metal
- Optional relay: prevents backfeed and helps with stable brightness
That layout keeps the system simple and serviceable. If you ever remove the headlights or revert to stock, the car’s original wiring remains untouched and intact.
Styling Tips That Keep the NA Looking Tasteful
The NA Miata rewards restraint. Halo rings should enhance the car’s face, not overwhelm it. That means choosing ring color carefully, matching the light temperature to the rest of the build, and avoiding over-bright halos that wash out the headlight housing at night. A crisp white DRL tends to look most cohesive on a clean street car, while amber switchback halos lean more toward track-inspired or show-ready styling.
Lens condition matters too. A halo upgrade will only look as good as the headlight lenses around it. If the covers are hazy, scratched, or yellowed, the ring will look dull even if it’s technically bright. Restoring the lens clarity before install makes a huge difference. It’s also smart to clean up surrounding front-end details, because the halo becomes part of a larger visual package rather than a one-off gimmick.
For drivers who want the front end to feel balanced, think beyond the lights themselves. A subtle lip, a tidy tow hook, and a clean plate solution can complement the halos without cluttering the nose. If you’re refining the whole front fascia, browse TopMiata’s main shop to match the lighting upgrade with supporting exterior pieces that fit the car’s character.
| Setup | Best Use | Install Complexity | Look |
|---|---|---|---|
| DRL-only halo | Clean daily driver | Low | Subtle, modern |
| Amber turn signal halo | OEM-plus styling | Medium | Functional, sharp |
| Switchback halo | Street and show builds | Medium-high | Most versatile |
Best Practices for Reliability and Long-Term Use
Reliability starts with using the right power source and protecting the circuit. Always fuse the DRL feed properly, and never assume a random accessory wire can handle the load. Even low-draw halos benefit from clean electrical architecture. If the kit uses a controller, keep it away from water intrusion and heat soak. A lot of lighting failures come from poor placement, not bad LEDs.
Spend time on the ground path. A solid ground is the difference between a halo that glows evenly and one that flickers when the turn signals or cooling fans activate. If you notice voltage drop, measure it before replacing parts. On older chassis like the NA, years of corrosion can create invisible resistance that only shows up once you add modern electronics. A fresh ground point and clean terminals often solve it.
Finally, make the install reversible. Use adapters, solderless connectors only where appropriate, and document your wiring with photos. That way the car stays easy to service and easy to upgrade later. For owners who treat the Miata as a long-term project, that kind of discipline is what separates a tidy enthusiast build from a messy one.
Bottom line: The best halo ring LED headlights on an NA Miata are the ones that look factory-inspired, wire cleanly, and remain easy to maintain for years.
Final Thoughts
Halo ring LED headlights can transform the NA Miata’s front end when they’re installed with purpose. Keep the wiring reversible, use proper isolation for switchback or amber functions, and focus on clean styling rather than maximum flash. Done right, the result is one of the most satisfying visual upgrades you can make to a classic roadster.
For context on the car’s history and design evolution, the official Mazda site offers useful background at Mazda’s official global website, while the broad model overview at Mazda MX-5 documentation helps place the NA in the larger MX-5 lineage. If you’re ready to keep building, start with a clean electrical plan, a thoughtful lighting choice, and a front-end style that still feels unmistakably Miata.